
How to add Disqus comments to your Astro Blog
Astro is a modern, lightweight framework designed for building static sites, but is also prepared to work with Server-Side Rendering (SSR) in a hybrid or full way. Its focus on speed and simplicity makes it an ideal choice for developers who want to create fast, SEO-optimized blogs or websites. With Astro, you can use your favorite front-end tools, such as React, Vue, or Svelte and even components with Vanilla JS/TS, while taking advantage of its powerful static site generation capabilities. Its island-based architecture and easy-to-use integrations allow you to create scalable, maintainable projects effortlessly. Whether you’re a beginner or an experienced developer, Astro offers a seamless development experience that prioritizes performance and ease of use.
Adding a comments section to your blog is a great way to engage with your readers and foster a sense of community. Disqus is a popular platform for this purpose, and integrating it into your Astro blog is straightforward. In this guide, I’ll walk you through the steps to add Disqus comments to your Astro blog.
I’m going to show you a way to implement the integration. For me, the recommended way is with Vanilla TS (which Disqus offers us). Since the implementation with React is not updated to version 19 and will bring us conflicts, we would have to install React 18 in Astro just to implement Disqus comments, which would not make much sense.

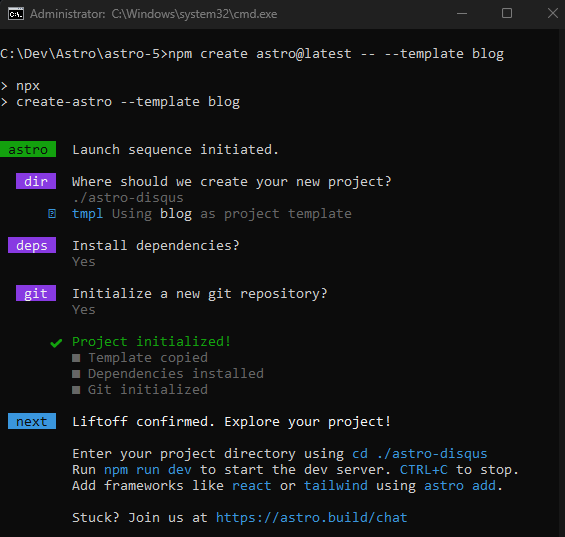
Create New Astro Project with a Blog Template
npm create astro@latest -- --template blog
Project Structure Blog with Astro
astro-disqus
├── .astro
├── node_modules
├── public
├── src
│   ├── components
│   │   ├── BaseHead.astro
│   │   ├── Footer.astro
│   │   ├── FormattedDate.astro
│   │   ├── Header.astro
│   │   ├── HeaderLink.astro
│   ├── content
│   │   └── blog
│   │       ├── first-post.md
│   │       ├── markdown-style-guide.md
│   │       ├── second-post.md
│   │       ├── third-post.md
│   │       └── using-mdx.mdx
│   ├── layouts
│   │   └── BlogPost.astro
│   ├── pages
│   │   ├── blog
│   │   │   ├── [...slug].astro
│   │   │   ├── about.astro
│   │   │   ├── index.astro
│   │   │   ├── rss.xml.js
│   ├── styles
│   │   └── global.css
│   ├── types
├── consts.ts
├── content.config.ts
├── README.md
└── .gitignore
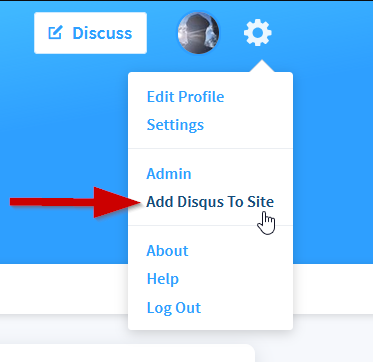
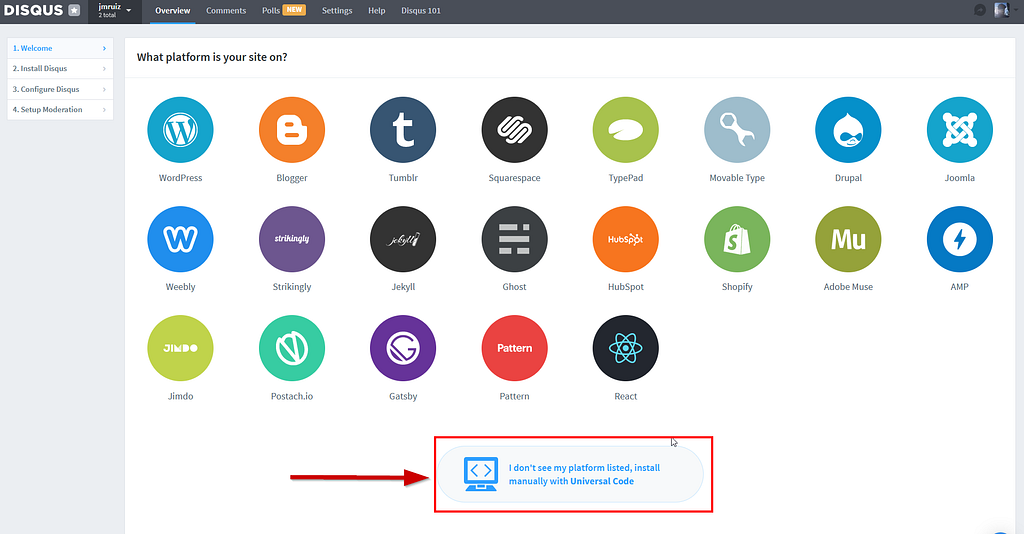
Create a Disqus Account and Set Up Your Site

Implementing Disqus with Vanilla JS/TS
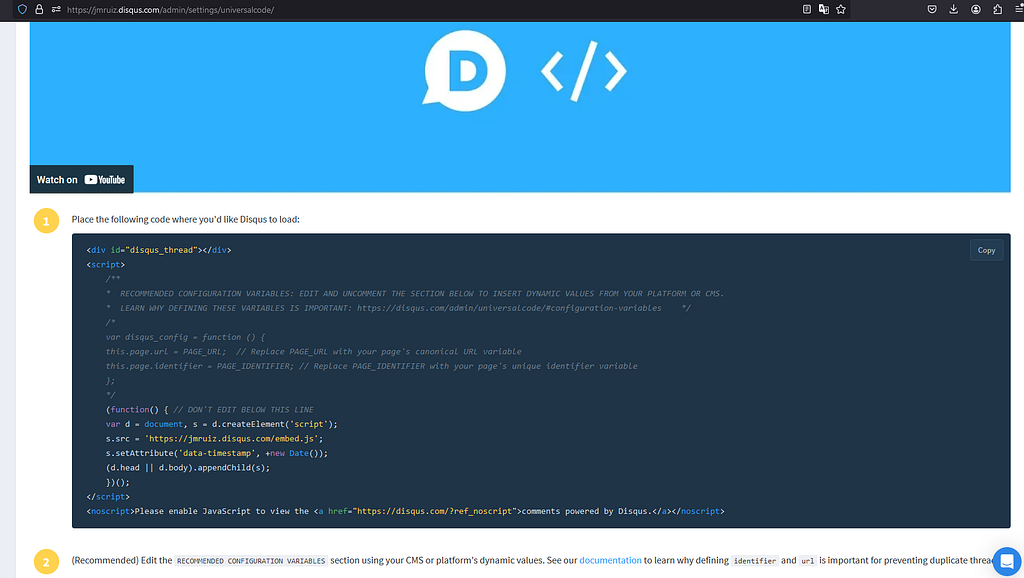
<div id="disqus_thread"></div>
<script>
    /**
    *  RECOMMENDED CONFIGURATION VARIABLES: EDIT AND UNCOMMENT THE SECTION BELOW TO INSERT DYNAMIC VALUES FROM YOUR PLATFORM OR CMS.
    *  LEARN WHY DEFINING THESE VARIABLES IS IMPORTANT: https://disqus.com/admin/universalcode/#configuration-variables    */
    /*
    var disqus_config = function () {
    this.page.url = PAGE_URL;  // Replace PAGE_URL with your page's canonical URL variable
    this.page.identifier = PAGE_IDENTIFIER; // Replace PAGE_IDENTIFIER with your page's unique identifier variable
    };
    */
    (function() { // DON'T EDIT BELOW THIS LINE
    var d = document, s = d.createElement('script');
    s.src = 'https://jmruiz.disqus.com/embed.js';
    s.setAttribute('data-timestamp', +new Date());
    (d.head || d.body).appendChild(s);
    })();
</script>
<noscript>Please enable JavaScript to view the <a href="https://disqus.com/?ref_noscript">comments powered by Disqus.</a></noscript>
We are going to adapt the code to Astro’s Client-Side Scripts, but even better, with an Astro component.
Add Comments.astro Component
astro-disqus
├── .astro
├── .vscode
├── dist
├── node_modules
├── public
├── src
│   ├── components
│   │   ├── BaseHead.astro
│   │   ├── Comments.astro  <── Comments component
│   │   ├── Footer.astro
│   │   ├── FormattedDate.astro
│   │   ├── Header.astro
│   │   ├── HeaderLink.astro
│   ├── content
│   │   └── blog
│   │       ├── first-post.md
│   │       ├── markdown-style-guide.md
│   │       ├── second-post.md
│   │       ├── third-post.md
│   │       └── using-mdx.mdx
│   ├── layouts
│   │   └── BlogPost.astro
│   ├── pages
│   │   ├── blog
│   │   │   ├── [...slug].astro
│   │   │   ├── about.astro
│   │   │   ├── index.astro
│   │   │   ├── rss.xml.js
│   ├── styles
│   │   └── global.css
│   ├── types
├── consts.ts
├── content.config.ts
├── README.md
└── .gitignore
src/components/Comments.astro
---
interface Props {
  url: string;
  id: string;
  title: string;
}

const { url, id, title } = Astro.props;
---

<div id="disqus_thread"></div>

<script define:vars={{ url, id, title }}>
 var disqus_config = function () {
   this.page.url = url;
   this.page.identifier = id;
   this.page.title = title;
 };

 (function() {
 var d = document, s = d.createElement('script');
 s.src = 'https://jmruiz.disqus.com/embed.js';
 s.setAttribute('data-timestamp', +new Date());
 (d.head || d.body).appendChild(s);
 })();
</script>
<noscript>Please enable JavaScript to view the <a href="https://disqus.com/?ref_noscript">comments powered by Disqus.</a></noscript>
The code is practically the same as the Disqus documentation indicates, with the addition of the Props interface and the passing of parameters with define:vars, a feature of the Astro meta framework, which would be the same as the passing of Reactjs props.
Import the Comment.astro component into BlogPost.astro layout
---
import Comments from '../components/Comments.astro';
---

<Comments
   url={Astro.url.href}
   id={Astro.params.slug as string}
   title={title}
/>
Full code -> src\layouts\BlogPost.astro
---
import type { CollectionEntry } from 'astro:content';
import BaseHead from '../components/BaseHead.astro';
import Header from '../components/Header.astro';
import Footer from '../components/Footer.astro';
import FormattedDate from '../components/FormattedDate.astro';
import Comments from '../components/Comments.astro';

type Props = CollectionEntry<'blog'>['data'];

const { title, description, pubDate, updatedDate, heroImage } = Astro.props;
---

<html lang="en">
 <head>
  <BaseHead title={title} description={description} />
  <style>
   main {
    width: calc(100% - 2em);
    max-width: 100%;
    margin: 0;
   }
   .hero-image {
    width: 100%;
   }
   .hero-image img {
    display: block;
    margin: 0 auto;
    border-radius: 12px;
    box-shadow: var(--box-shadow);
   }
   .prose {
    width: 720px;
    max-width: calc(100% - 2em);
    margin: auto;
    padding: 1em;
    color: rgb(var(--gray-dark));
   }
   .title {
    margin-bottom: 1em;
    padding: 1em 0;
    text-align: center;
    line-height: 1;
   }
   .title h1 {
    margin: 0 0 0.5em 0;
   }
   .date {
    margin-bottom: 0.5em;
    color: rgb(var(--gray));
    display: flex;
    align-items: center;
    justify-content: center;
    gap: 1em;
   }
   .comments-count {
    color: rgb(var(--gray));
    font-size: 0.9em;
   }
   .last-updated-on {
    font-style: italic;
    color: rgb(var(--gray));
   }
  </style>
 </head>

 <body>
  <Header />
  <main>
   <article>
     <div class="hero-image">
     {heroImage && <img width={1020} height={510} src={heroImage} alt="" />}
     </div>
    <div class="prose">
     <div class="title">
      <div class="date">
       <FormattedDate date={pubDate} />
       {
        updatedDate && (
         <div class="last-updated-on">
          Last updated on <FormattedDate date={updatedDate} />
         </div>
        )
       }
      </div>
      <h1>{title}</h1>
      <hr />
     </div>
     <slot />
    </div>
   </article>

   <div class="comments-section" style="margin-top: 2em; max-width: 720px; margin: 2em auto;">
    <Comments
     url={Astro.url.href}
     id={Astro.params.slug as string}
     title={title}
    />
   </div>
  </main>
  <Footer />
 </body>
</html>
Run in console
npm run dev

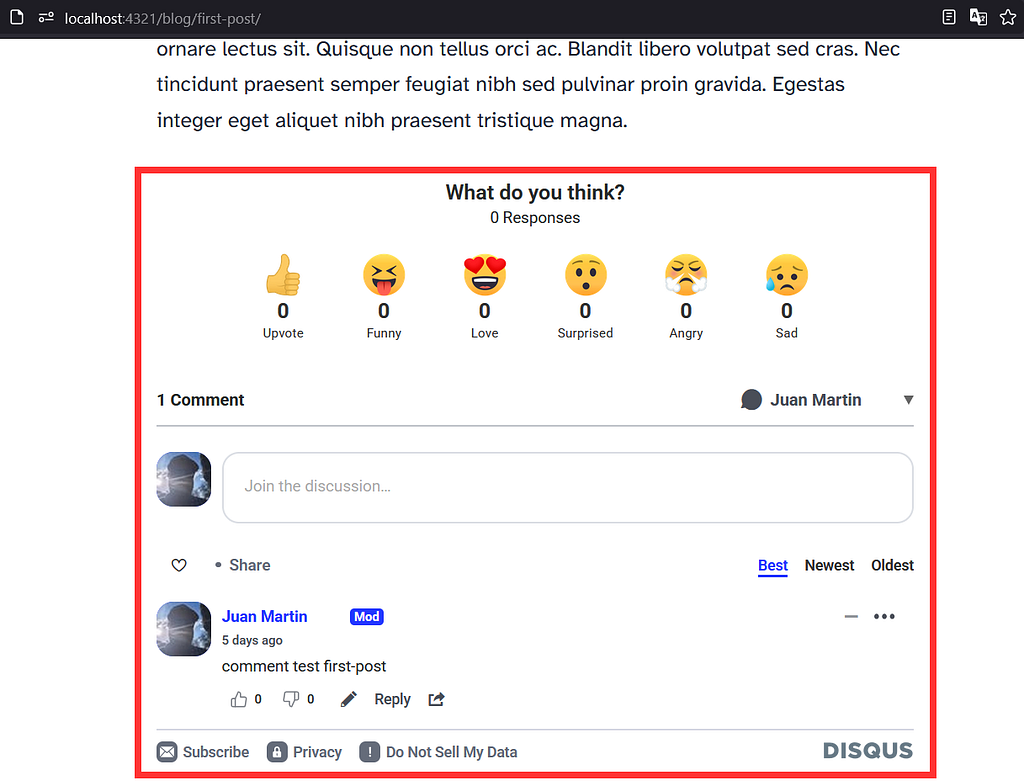
The great thing about Astro is that your project is totally static by default, it generates HTML with zero javascript and as your needs change you can add small islands of interactive Javascript, either with Inline Scripts, Astro components or with some of the most popular front-end libraries. Astro is very versatile, if you want to add more dynamism with little configuration you can change to Server-Side Rendering (SSR) only in the parts you need while the rest of the site is static or you can configure your project to be Server-Side Rendering (SSR) by default.